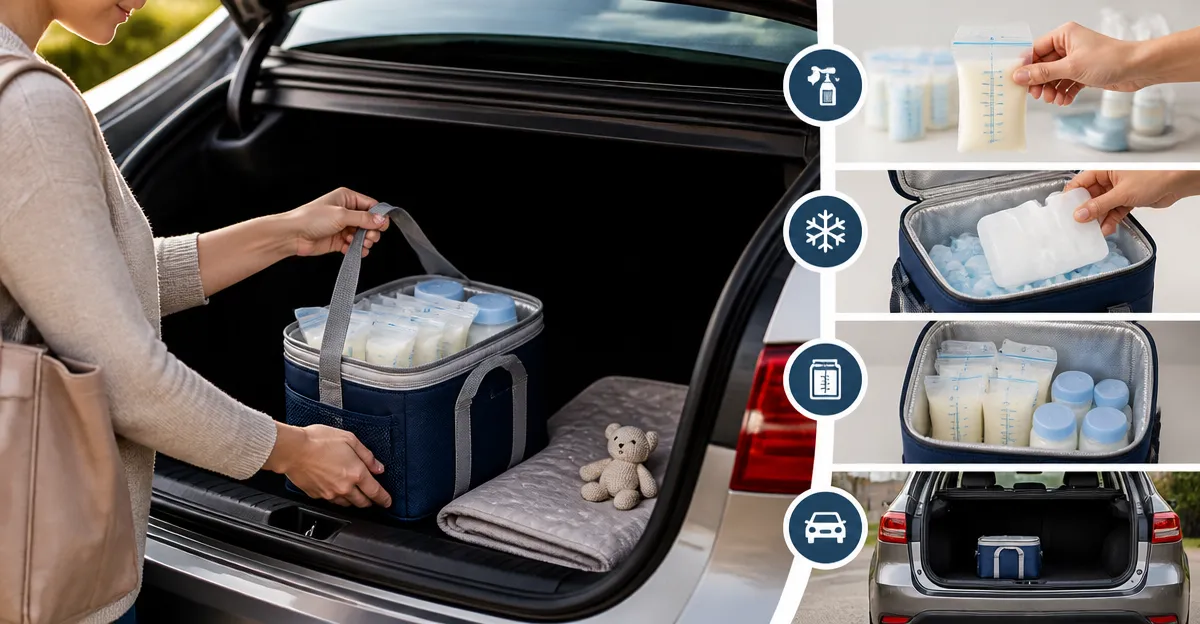
How to Safely Transport Expressed Breast Milk in Your Car Trunk: Practical Tips to Keep Milk Cold and Contamination‑Free
Introduction
Transporting expressed breast milk from home to a childcare facility, a relative’s house, or a workplace can present a series of logistical challenges. This guide explains how to maintain optimal temperature, prevent bacterial contamination, and protect nutritional quality while the milk resides in a vehicle trunk. Readers will learn a systematic approach that combines proper preparation, insulated storage solutions, and real‑time monitoring. The information is valuable for any parent who wishes to preserve the health benefits of breast milk during longer trips without relying on expensive, single‑use ice packs.
The strategies presented are based on current best practices in infant nutrition, as well as user feedback from highly rated Amazon products. By following the steps, one can achieve confidence that the milk will remain within the safe temperature range of 2 °C to 4 °C for up to 24 hours.
What You’ll Need
- Insulated breast‑milk cooler (e.g., PLOSIF Breast Milk Cooler Bottle)
- Pre‑frozen cooling tubes or inserts (e.g., Momcozy Portable Breast Milk Cooler Lite)
- Secondary insulated bag for auxiliary items (e.g., Mancro Breastmilk Cooler Bag)
- Digital temperature probe or thermometer
- Clean, BPA‑free storage bottles (included with most coolers)
- Labeling supplies (water‑proof marker or stickers)
Step 1: Prepare the Milk for Transport
Begin by expressing milk using a clean, sterilized pump. Transfer the milk into the BPA‑free bottles that accompany the cooler, ensuring that each bottle is sealed tightly. Label each bottle with the date and time of expression; this practice aids in tracking freshness and complying with the “first‑in, first‑out” principle.
If the milk has been stored in the refrigerator, allow it to reach a temperature of approximately 4 °C before packing. Warmer milk can raise the internal temperature of the cooler, reducing the overall cooling efficiency.
For extended trips, consider pre‑freezing a portion of the milk in small, single‑serve containers. Frozen milk can be thawed gradually in the cooler, extending the safe storage window.
Step 2: Choose the Right Insulated Cooler
Select an insulated container that offers both temperature stability and convenient bottle organization. The PLOSIF Breast Milk Cooler Bottle provides a 22 oz capacity, dual‑bottle system, and a digital temperature display that allows real‑time monitoring without opening the cooler. It is rated 4.6 out of 5 stars by 382 reviewers and costs $39.99. Its 360° surround cooling tube technology maintains freshness for up to 24 hours without additional ice packs.
An alternative is the Momcozy 22oz Breastmilk Cooler, priced at $89.99 with a 4.8‑star rating from 2,476 reviews. This model also employs 360° cooling tubes, includes two separate bottles for warm and cold milk, and offers a robust exterior that resists dents during travel.
Both products are food‑grade, BPA‑free, and designed for easy disassembly, which simplifies cleaning after each use. The choice between them depends on budget, desired capacity, and personal preference for single versus dual bottle configurations.
Step 3: Pre‑Freeze the Cooling Elements
Effective cooling relies on pre‑frozen tubes that act as reusable ice packs. Place the cooling tubes supplied with the cooler in a freezer set to 0 °F (‑18 °C) for at least 12 hours. The Momcozy Portable Breast Milk Cooler Lite uses a similar 360° cooling tube system and is praised for its “set‑and‑forget” simplicity. It retails for $59.99 and holds a 4.6‑star rating from 360 reviewers.
Ensure the tubes are fully frozen before insertion; partially frozen tubes reduce the duration of the cooling effect. For trips longer than 24 hours, consider freezing two sets of tubes and swapping them midway through the journey.
While the cooler itself provides insulation, the frozen tubes create a cold reservoir that maintains a stable internal temperature even when the external environment fluctuates, such as when the vehicle engine is turned off.
Step 4: Pack the Cooler Efficiently
Place the frozen cooling tubes at the base of the cooler, then arrange the filled milk bottles on top. Position the bottles upright to prevent leakage and to allow any condensation to drain away from the milk. If additional items, such as a small ice pack or a digital thermometer, are required, store them in a separate insulated compartment.
The Mancro Breastmilk Cooler Bag can serve as a secondary sleeve for extra bottles or for transporting pump accessories. It costs $16.14, carries a 4.8‑star rating from 3,337 reviewers, and features a water‑resistant polyester exterior with a leak‑proof liner.
Close the cooler securely, ensuring that any zippers or seals are fully engaged. The digital temperature display on the PLOSIF cooler can be checked now to confirm that the internal temperature is within the safe range.
Step 5: Position the Cooler in the Trunk
Place the cooler on a flat surface in the trunk, preferably against the side wall to minimize movement during transit. Avoid stacking heavy objects on top of the cooler, as this can compress the insulation and reduce its effectiveness.
If the vehicle has a built‑in temperature control for the cargo area, set it to a cool setting (around 10 °C) to provide an additional buffer against heat. However, rely primarily on the cooler’s internal insulation rather than the vehicle’s climate control, because trunk temperatures can rise quickly on sunny days.
Secure the cooler with a strap or a non‑slip mat if the trunk is prone to shifting loads. Stability prevents accidental opening and reduces the risk of spillage.
Step 6: Monitor Temperature During Travel
Use a digital thermometer with a probe that can be left inside the cooler without opening it. Record the temperature at the start of the trip and then at regular intervals (e.g., every two hours). If the temperature approaches 5 °C, consider adding a second set of frozen tubes or a small ice pack from the Mancro bag.
The PLOSIF cooler’s built‑in digital display provides a convenient visual cue; however, an external thermometer offers redundancy and can be calibrated for higher accuracy.
Should the temperature rise above 8 °C, transfer the milk to a refrigerator as soon as possible. Milk that exceeds 10 °C for more than two hours should be discarded to avoid bacterial growth.
Step 7: Transfer Milk Upon Arrival
When you reach the destination, open the cooler promptly and remove the bottles. Place the bottles in a refrigerator set to 4 °C or lower within 30 minutes of arrival. If a refrigerator is unavailable, store the bottles in an insulated cooler with fresh ice packs until a refrigerator can be accessed.
Label any remaining milk with the new date and time if it will be used later that day. This practice maintains clear records for safe feeding schedules.
Clean the cooler and any reusable components with warm, soapy water or place them in a dishwasher if the manufacturer permits. Proper cleaning prevents the buildup of milk residue, which can harbor bacteria.
Tips & Pro Tips
- Freeze cooling tubes at least 24 hours before a long trip to ensure they are fully solid.
- Use a separate insulated bag (such as the Mancro bag) for pump accessories to keep them dry and organized.
- Consider a small portable power bank to run a digital thermometer with Bluetooth alerts.
- When traveling on hot days, park the vehicle in the shade and close windows to reduce trunk heat buildup.
- Rotate bottles regularly so that the oldest milk is used first, reducing waste.
Troubleshooting
| Problem | Possible Cause | Solution |
|---|---|---|
| Temperature rises above 5 °C within an hour | Cooling tubes not fully frozen or insufficient insulation | Replace tubes with a fresh frozen set and verify cooler seal. |
| Milk leaks inside the cooler | Bottle caps not tightened properly | Secure caps tightly and place a small absorbent pad beneath bottles. |
| Cooler feels heavy after freezing | Ice pack water not drained | Remove excess water from tubes before placing them back in the cooler. |
Conclusion
By following the systematic approach outlined above, parents can transport expressed breast milk in a car trunk with confidence that the milk remains cold, safe, and nutritionally intact. Selecting an appropriate insulated cooler, pre‑freezing cooling tubes, and monitoring temperature are the three pillars of successful transport. The recommended products—PLOSIF Breast Milk Cooler Bottle, Momcozy 22oz Breastmilk Cooler, Momcozy Portable Breast Milk Cooler Lite, and Mancro Breastmilk Cooler Bag—provide reliable tools that simplify each step. Implement these practices on every journey to ensure that the baby receives the full benefits of fresh breast milk, no matter where the road leads.
Products Mentioned in This Guide
Frequently Asked Questions
What temperature should expressed breast milk stay at while in a car trunk?
Keep the milk between 2 °C and 4 °C to ensure safety and preserve nutrients.
Can I use reusable ice packs instead of single‑use ones?
Yes, reusable gel packs are effective and eco‑friendly when frozen solid before travel.
How long can breast milk remain safe in an insulated cooler in the trunk?
A quality insulated cooler can maintain safe temperatures for up to 24 hours if pre‑chilled.
What is the best way to prevent bacterial contamination during transport?
Store milk in sealed, sterile containers and avoid opening the cooler until you reach your destination.
Do I need to monitor the milk temperature while driving?
Using a small digital thermometer or temperature‑indicator strip lets you quickly verify the milk stays cold.